

Service Territories
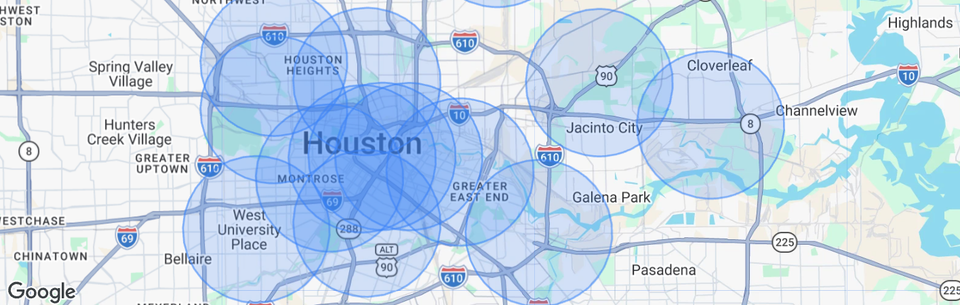
Tell KlientHQ where you work, so online booking only takes jobs in your area.
At a glance
You'll accomplish: One working service territory: a location, a service area, hours, scheduling rules, and services. It is ready for online booking.
Time needed: About 10 minutes for your first territory.
What you need
- A KlientHQ login that can create territories
- The address at the center of your service area
- A list of ZIP codes you serve, or a distance you are willing to drive
Before you start
- Decide how you think about your area. Do you serve certain ZIP codes, or "anything within 25 miles of the shop"? Your answer picks the area type in Step 4.
- Have your business hours in mind. The Hours step starts from your saved business hours. You can change each day.
- Know who works this area. Assigning team members is optional. You can skip it and come back.
- Services can wait. You do not need any services yet. You can leave a territory on All Services and set up services next. Our services guide covers that.
Pick how you describe your area
You choose one method per territory. Pick the one that matches how you already think about your work.
| Area type | What the app says | Good for |
|---|---|---|
| ZIP Codes | Define service area by postal codes | Businesses that serve specific towns or ZIP codes |
| Radius | Circle around a center point | Businesses that serve everything within a set distance of one spot |
| Custom Geofence Pro | Draw custom polygon boundaries | Not covered in this guide |
| Drive-Time Isochrones Pro | Real drive-time boundaries | Not covered in this guide |
| Technician Density Heatmaps Plus | Auto-balance by tech locations | Not covered in this guide |
| Customer LTV Zones Plus | Protect high-value accounts | Not covered in this guide |
This guide walks through ZIP Codes and Radius. They carry no plan badge. The other four carry a Pro or Plus badge in the picker.
Step by step
Open the territories page
In the main menu, click Settings. Then, under the Business group, click Service territories.
You will see two tabs, Active and Disabled, each with a count. A blue + New territory button sits at the top right. Each territory you already have shows as a card.

No territories yet? The page says so and invites you to create your first one.
Start a new territory
Click + New territory. A window titled Create New Territory opens.
The window has six steps, shown in a row across the top: Location, Service Area, Hours, Scheduling, Services, and Providers. A progress bar shows how far along you are. You can go back at any time with Back.
Set the location
- In Territory Location (required), start typing an address and pick one from the suggestions. Choose the center of the area you serve, such as your shop or the middle of town. A green check appears when the pick works.
- Look at Territory Name. The app fills it in from your location. Change it to something clear, like "North Side" or "Downtown Dallas".
- Look at Timezone. It is set from the location you picked.
- Under Delivery & status, check the four switches. The defaults suit most cleaning, HVAC, and landscaping businesses.

| Switch | What it does | Starts as |
|---|---|---|
| Mobile Services | You travel to customers' addresses within the service area | On |
| In-Person Appointments | Customers visit your business location | Off |
| Online Booking | Lets customers book online in this territory | On |
| Status | Turns the territory on or off | On |
Click Next when the location and name look right.
Choose your service area
On Service Area Boundaries, click the card for the area type you picked. ZIP Codes is already selected. Then fill in the details for that type.
If you chose ZIP Codes
- In the ZIP Codes box, type each 5-digit ZIP code. Press Enter or Space after each one. The app adds the comma for you.
- Optional: click AI Suggest to get ZIP codes proposed from your location. Read the list before you keep it.
- Check the map preview under the box. It is a quick visual check, not an exact boundary.

If you chose Radius
- Click the Radius card.
- Open the Radius (miles) dropdown and pick a distance. The choices are 5, 10, 15, 25, and 50 miles. It starts at 25.
- The circle is measured from the Territory Location you set in Step 3. The app shows the center point under the dropdown.

Click Next.
Set your hours
Hours of Operation lists Sunday through Saturday. The text above it reads "Defaults are based on your business hours."
- For each day, use the switch to mark the day open or closed.
- For open days, set the Open and Close times.
- Optional: click Suggest Hours for a starting schedule. Read it before you accept it.
- Click Next.
Choose how time slots work
The Scheduling step controls how time slots look to customers, and how KlientHQ decides a slot is open.
- Under Timeslot format, choose Exact times (for example, 9:30 am) or arrival windows. Exact times is the default.
- Under Timeslot interval, choose how far apart start times are. It starts at 1 hour. A small example below shows what customers will see, such as 8:00 AM, 9:00 AM, and 10:00 AM.
- Under Availability Options, pick Based on Service Provider Availability (the default) or Manual. The first uses your providers' schedules and jobs already booked. The second lets you set a maximum number of jobs per slot or day.
- Scroll down for more options. With provider-based availability, Account for Drive Time is on, a 10 minute buffer sits around each job, and jobs are limited to 10 miles apart.
- Click Next.

Choose the services
On the Services step, you pick which services this territory offers.
- All Services (the default) makes every enabled service bookable in this territory, including ones you add later.
- Specific Services is for choosing only some services. The app describes it as "Only selected services will be bookable in this territory."

Add providers and create the territory
- On the Providers step, tick the team members who work this area, or use Select all.
- No one to add yet? Skip this step. You can edit the territory later and assign people then.
- Click Create Territory.
A message confirms the territory was created, with its name. The window closes and your new territory appears on the Active tab.

What you'll see when you finish
Each territory shows as a card with its name, an Active or Disabled badge, the address you picked, and a short summary of the area, such as "3 ZIPs" or "25 mi radius". It also lists the timezone, whether it offers All services, and how many providers are assigned.
- To change a territory: click its card, or Edit territory. All six steps open, so you can jump to the one you need.
- To turn one off without losing it: switch Status off on the Location step and save. It moves to the Disabled tab.
Test it the way a customer would
- Open your public booking page.
- Enter a ZIP code you serve. You should move on to the next step.
- Go back and enter one you do not serve. You should not be able to go further.
If something isn't working
The Next button won't let me continue.
On the Location step, make sure you picked an address from the suggestions, so you see the green check. On the Service Area step, ZIP Codes needs at least one ZIP, and Radius needs a location.
My territory name has the city twice, or the wrong city.
The app can add the city after you pick a location. Click into Territory Name and type the name you want before you click Next. You can also fix it later with Edit territory.
Every customer is being turned away.
Check the Active tab. A territory that is Disabled, or has Online Booking switched off, is not used for online booking. At least one territory needs to be on, with Online Booking on.
A customer near the edge of my area was turned away.
A radius is a circle from one point, so places near the edge can fall outside it. Try the next distance up. Or create a ZIP Codes territory for that ZIP.
The map preview is blank.
The preview is only a visual aid. Your area still saves without it.
I can't use Custom Geofence, Drive-Time Isochrones, or the other badged types.
Those cards carry a Pro or Plus badge. ZIP Codes and Radius have no badge, so start with one of them.
Next step
Your territory tells online booking where you work. Next, tell it what you sell. Set up your services, with prices, durations, add-ons, and questions, so customers have something to book.